How to Open a Psd in Camera Raw
This chapter is from the book
Opening photos into Camera Raw
For a smooth workflow, we recommend setting the proper preferences so your raw photos (and JPEG or TIFF photos, if any) will open directly into Camera Raw.
To set a preference so your raw photos open directly into Camera Raw:
- In Photoshop, go to Edit/Photoshop > Preferences (Ctrl-K/Cmd-K) > File Handling.
- Under File Compatibility, check Prefer Adobe Camera Raw for Supported Raw Files, then click OK. When you double-click a raw file, it will open into Camera Raw (as opposed to other software that can be used to convert raw files).
To set a preference so your JPEG or TIFF photos open directly into Camera Raw:
- In Bridge, choose Edit/Adobe Bridge CC > Camera Raw Preferences.
- At the bottom of the dialog, from the JPEG menu, choose Automatically Open JPEGs with Settings.
- If you shoot digital TIFF photos, from the TIFF menu, choose Automatically Open TIFFs with Settings; or if you shoot only raw or JPEG photos (not TIFF photos), choose Disable TIFF Support.
- Click OK.
When you want to open a JPEG or TIFF photo into Camera Raw that has not yet been edited (doesn't have Camera Raw settings), click the thumbnail in Bridge, then click the Open in Camera Raw button
 or press Ctrl-R/Cmd-R.
To open a JPEG or TIFF photo that has been edited previously in Camera Raw (that is "with Settings"), double-click its thumbnail or press Ctrl-R/Cmd-R.
- If you enable both "Automatically Open" options (steps 2–3, above), but there is an occasion when you want to open a JPEG or TIFF photo directly into Photoshop instead of Camera Raw, click the thumbnail, then press Ctrl-O/Cmd-O. This shortcut will work only if the file hasn't yet been edited in Camera Raw.
- If the Open in Camera Raw button is available when you click a thumbnail in Bridge, it's a sign that the file can be opened into Camera Raw.
You can set a preference to have either Bridge or Photoshop host the Camera Raw plug-in when you open a raw or JPEG photo. In the case of Photoshop, the program will launch, if it's not already running. Also, when Bridge is the host for Camera Raw, the default (highlighted) button for exiting that dialog is labeled Done, whereas when Photoshop is the host for Camera Raw, the default exit button is Open Image or Open Object, depending on a setting in the Workflow Options dialog (see step 7 on page 60).
To choose a host for Camera Raw:
- In Bridge, choose Edit/Adobe Bridge CC > Preferences (Ctrl-K/Cmd-K), then show the General pane.
- Check Double-Click Edits Camera Raw Settings in Bridge if you want Camera Raw to be hosted by Bridge when you double-click a thumbnail in Bridge (a raw photo or a JPEG that was previously edited in Camera Raw), or uncheck this option to have the file open into Camera Raw hosted by Photoshop. Click OK.
After setting the necessary preferences, and before learning the particulars of Camera Raw, you should familiarize yourself with this basic workflow.
To open a raw or JPEG digital photo into Camera Raw:
- Launch Bridge, display the thumbnail for a raw or JPEG photo, then do either of the following:
For a raw photo, double-click the thumbnail.
For a raw or JPEG photo, click the thumbnail, then press Ctrl-R/Cmd-R or click the Open in Camera Raw button on the Bridge toolbar
(or right-click the photo and choose Open in Camera Raw).- To open a file from the Mini Bridge panel in Photoshop into Camera Raw, right-click the thumbnail and choose Open With > Camera Raw from the context menu.
- The Camera Raw dialog opens. A An alert symbol
 may display in the upper-right corner of the preview while Camera Raw reads in the image data, and will disappear when it's done.
 Information about your photo (taken from the metadata that was embedded into it by the camera) is listed in several locations: the camera model in the title bar at the top of the dialog; the file name below the preview; and the camera settings used to take the photo (aperture, shutter speed, ISO, and focal length) below the histogram.
The adjustment features are located in 10 tabs: Basic, Tone Curve, Detail, HSL/Grayscale, Split Toning, Lens Corrections, Effects, Camera Calibration, Presets, and Snapshots. Switch among the tabs to correct your photo (we cover most of the tabs in depth in this chapter).
- When you're done correcting the photo, you can either click Open Image to open the photo into Photoshop or click Done to close Camera Raw without opening the photo. In either case, the Camera Raw settings will stick to the photo, and the original data will be preserved. (Note: If you want to open the photo into Photoshop as a Smart Object, see the Note on page 94.)
A file that you open from Camera Raw into Photoshop as a Smart Object can be reedited using the full array of features in Camera Raw at any time. A standard image layer in a Photoshop document can also be edited using most — but not all — of the Camera Raw features by way of the Camera Raw Filter, as described in the task below. If you convert the image layer to a Smart Object first (an optional step), you will be able to edit the filter settings at any time. Note: To learn about layers, which are used in this task, see Chapter 8. To learn more about Smart Objects, see pages 262–269. See also the Note on page 94.
Among the Camera Raw features that aren't available via the Camera Raw Filter are the Crop and Straighten tools, the rotate buttons, the Workflow Options dialog, the Snapshots tab, and some options on the Camera Raw Settings menu. Don't be dissuaded by this list of "nos," however — the filter gives you access to the essential Camera Raw features.
To open and edit a Photoshop image layer in Camera Raw: 
- In an RGB document in Photoshop, display the Layers panel.
 Click the image layer (or the Background) that you want to edit in Camera Raw, then press Ctrl-J/Cmd-J to duplicate it. Keep the duplicate layer selected. A
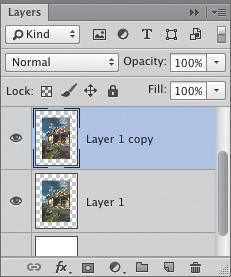
A We duplicated an image layer.
- Optional (but recommended): To keep your Camera Raw settings editable, choose Filter > Convert for Smart Filters, or right-click the duplicate image layer and choose Convert to Smart Object. B If an alert dialog appears, click OK.
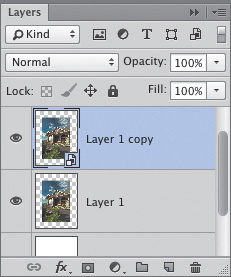
B We converted the duplicate layer to a Smart Object.
- With the image layer or Smart Object selected, choose Filter > Camera Raw Filter (Ctrl-Shift-A/ Cmd-Shift-A).
- The image layer opens in Camera Raw. Apply the needed corrections.
- Click OK (a progress bar may display while the filter is processing).
- If you applied the filter to a Smart Object, on the Layers panel, you will see a Camera Raw Filter listing below a Smart Filters listing. C To edit the Camera Raw settings at any time, double-click the Camera Raw Filter listing. To learn more about Smart Filters, see pages 362–366.
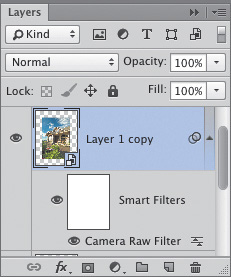
C We applied the Camera Raw Filter to the Smart Object. A Smart Filters listing appeared below the Smart Object.
- To create a document via the Merge to HDR Pro command, then adjust the new document via the Camera Raw Filter, see pages 248–251.
How to Open a Psd in Camera Raw
Source: https://www.peachpit.com/articles/article.aspx?p=2111972&seqNum=2