How to Make Money as a 3d Artist
10 anatomy tips for 3D artists
Anatomy for 3D Artists is the latest title from 3DTotal Publishing to bring you invaluable expert advice from a range of accomplished artists, this time focusing on the vast subject of anatomy.
Non-software specific, it is packed with everything that today's 3D artist needs to know in order to tackle the difficult task of recreating the human form in 3D.
Here we share a selection of handy tips from the book; we hope you find them useful.
01. Use the silhouette
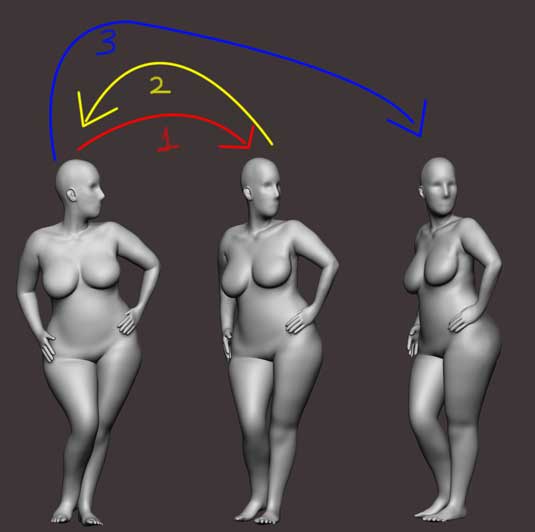
The silhouette is a vital part of the process. You should always focus on the silhouette – it is not something that should be worked on once, then forgotten; you need to pay attention to it all the time, even on the final touches.
I have found it useful to mimic the silhouette from one angle, then spin the model 15 degrees and work on the silhouette again from this new angle. Then go back to the original angle and rework; then spin your model 30 degrees and repeat this process all the way round.
Tip from: José Péricles
02. Research
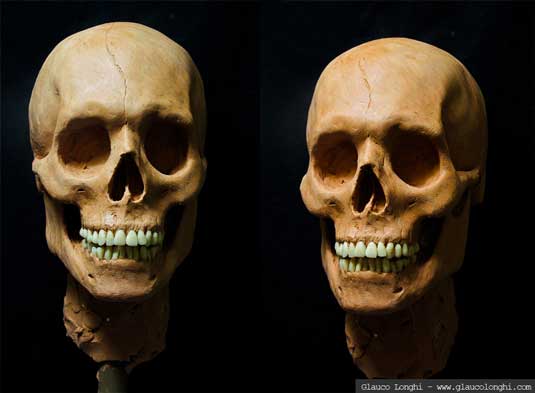
No matter what, you can never have enough references. Before starting anything new, spend some time doing research. Even if you are doing clothing for example, study a bit about the subject first. For stylized characters, I still like to imagine how the anatomy or the bone structure would be.
Tip from: Glauco Longhi
03. Change the lighting position

To get a good idea of how well the surface is working, you should change the light positions while rendering as much as possible. In comparing the results of extreme angles (a key light from the top or bottom, for example), you can make out some huge differences between how shapes look on the surface.
Tip from: Mario Anger
04. Learn the main head shapes
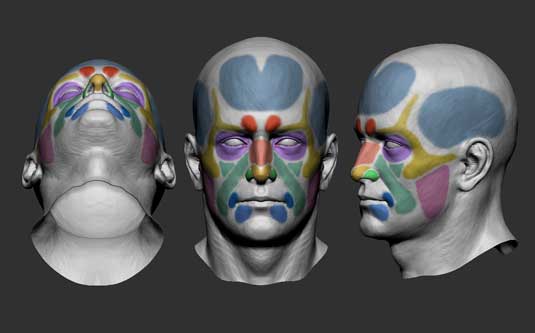
Fitting the face together can be difficult. Knowing relative sizes can be a big help: the nose takes up about a third of the face vertically; the lips are about as wide as the centers of the eyes; the ears extend from the corner of the eye to the bottom of the nose, and so on.
Look at the sculpt from below, checking for adequate curvature in the forehead and whether the lips wrap correctly around the teeth. Notice how the jaw line is actually fairly soft; a common error is to make the jaw too prominent or angular.
Tip from: Djordje Nagulov
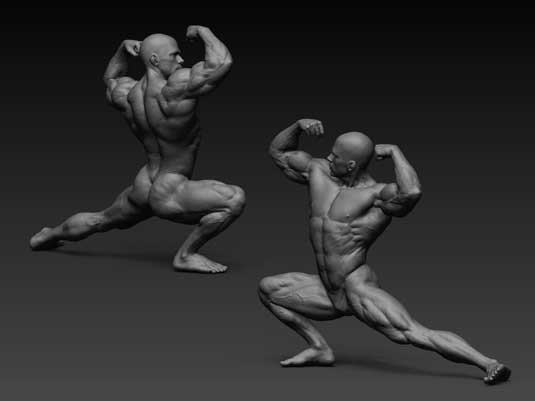
05. Every action has a reaction
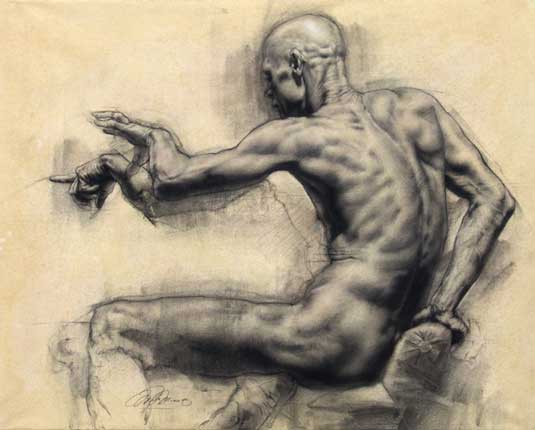
It is important to understand how one action creates reactions that reverberate throughout the body. Be sure to understand the direction of both the posterior spine of the scapula and the medial border which turns laterally when the arm is raised.
Look carefully for the evidence of these landmarks. Knowledge of the purpose or action of each muscle helps in understanding the complexity. For instance, knowing that the acromial portion of the deltoid abducts the arm gives a reason for the volume of that form in this position.
Tip from: Charles Miano
06. Understand the muscles of the forearm
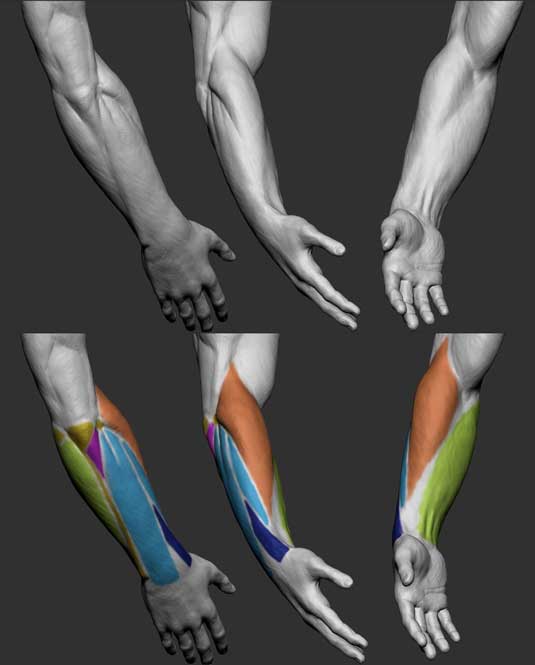
Like the lower leg, the muscles of the forearm are tough to analyze correctly. It helps to break them down into three main components: the extensors on the outside, the flexors on the inside, and the brachioradialis, which provides the distinctive shape as it wraps around the radius.
Note how far into the upper arm it climbs. Two other, easily overlooked shapes are also crucial for the silhouette: the muscles of the thumb which "interrupt" the extensors, and the elongated triangle of the anconeus, which sits under the olecranon.
Tip from: Djordje Nagulov
07. Take care with the fingers
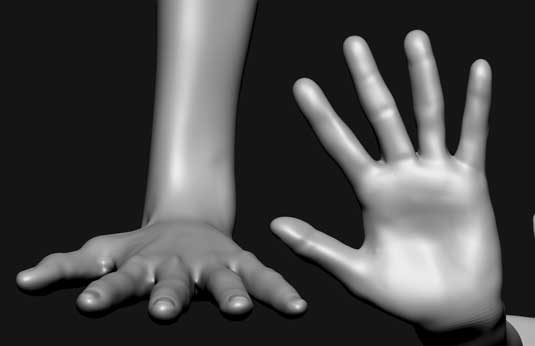
Make sure you look at the hands from different angles when modeling so that you get the curvature of the fingernails. You'll also notice that each finger is not perfectly straight; all of them curve slightly towards the middle finger.
If you draw an imaginary line continuing that curve, all four fingers' curves would converge. That is a detail that a lot of people often forget and I think it's very important to keep it in mind; making the fingers perfectly straight would make the hand look very plastic.
Tip from: César Zambelli
08. Break it up into bite-size pieces

I break down the major sections of the skeleton into smaller components: the skull, torso, upper limbs, and lower limbs. Because there are so many bones, grouping this way makes it easier to memorize and understand their function – you may find this useful as you find out more about human anatomy and discover the number of muscles there are to become familiar with!
Tip from: Chris Legaspi
09. Sculpting toes pointing straight down

Curling the toes downward happens mostly at the base of each toe, so be sure to sculpt in the angle change that appears at the knuckles. The toes bunch together and push into the fat pads on the sole, producing many wrinkles.
Although we tend to think of feet as relatively flat, pointing the toes like this can introduce substantial curving in the sole. If you look carefully you'll notice this curve isn't of an even nature, as there are definite "breaks" in a couple of places, generally where the joints meet.
Tip from: Djordje Nagulov
10. Add imperfections
When it comes to realistic organic modeling, you should be a bit messy, because organic models always have some variations and imperfections in their muscles, skin, bones, and fat. Don't smooth everything out; leave some sharp edges between the muscles (unless you're working in a more cartoon-like style).
Tip from: Arash Beshkooh
For a comprehensive human anatomy guide for today's 3D artist, offering fundamental, theoretical, and practical skills for anatomy and proportion, see Anatomy for 3D Artists, on sale now for £29.99.
Liked this? Try these...
- 3 ways to improve your anatomy in ZBrush
- 15 top tips for creating realistic sculptures
- The best photo editors
Related articles
How to Make Money as a 3d Artist
Source: https://www.creativebloq.com/3d/10-anatomy-tips-3d-artists-121518144